
Post Groups is a hugely powerful asset to your marketing team, allowing you to automatically schedule hundreds of social media posts days, weeks or even months in advance. It will help you ensure your social presence is always active and free up time to spend on other aspects of your marketing strategy.
Create unique categories to help organise your content, set schedules for each group, and generate evergreen social marketing with automatic post repetition. Here are our pro tips on getting the most out of your Post Groups feature.
Create unique posting categories
Our tool comes with five default groups to get you started:
- General – Anything that you want to add to Post Groups that doesn’t fit the categories below can go in here.
- News & Insights – Add articles directly from your Content Discovery. These are one-share posts as they rely on being timely and relevant to engage your audience.
- Promotions – Incorporate posts surrounding campaigns or promotional events in your company. Use these to spread awareness of your brand, but don’t overload your channels with too much self-promotional content.
- Questions – Start conversations with industry relevant questions aimed at your audiences.
- Seasonal – Share topics depending on the time of year or public holiday. For example, Christmas related posts, content about the summer, or a certain time of year particularly relevant to your industry.
Efficiently navigate between these groups by selecting them from the list on the left on your dashboard.

If you don’t already have a strategy in place for how you want to organise your content, we recommend you start with these while you explore our tool and then when you’re feeling more confident, you can start to create your own!
Depending on your industry, audience or preferences for staying organised, you can choose to categorise your Post Groups in different ways.
Organise by type of content – this is the most common way of organising content and is a great way to get started with Post Groups. Some more examples are:
- Company blog posts
- Company news/updates
- Non-company blog posts
- Insightful quotes
- Video links
- Pro tips
- Statistics
- New product announcements
- Tool/service reviews
Organise by topic – if your industry is broad and you want to make sure you have diverse range of topics in your posts, try arranging your Post Groups by key topics that your content covers. This will be very specific to your business, so if you were a telecommunications company your groups may be:
- 5G
- Broadband
- Tariffs
- Connectivity
- Devices
Organise by tone – this is a less common way of segmenting your content but may be effective for you and your team. Examples of this could be:
- Humour
- Inspirational
- Forward-thinking
- Serious
- Instructional
- Informative
Organise by specific campaign – we suggest you use this to segment your promotional posts further to ensure you’re covering all your campaigns. These groups will be completely unique to your company and the promotions you have going on at that time.
Setting your ideal schedule
Each group will have its own unique schedule based on the days of the week and times of day you want to share your posts. To get started, click the Schedule button at the top right of your screen and select which days and times you want posts in that group to share to your social channels.

Once you’ve set your schedule and begun adding posts, our tool will automatically publish your posts to your chosen social profiles on those days. When you’re applying your schedule, think about when your audiences will be most active on your channels and when engagement is highest.
If you’re not sure when that is, here are our recommended best times to post on each platform:

While these are useful guidelines for your business to consider, bear in mind that they can vary from industry to industry. It’s definitely worth analysing your company’s posts to see what days and times are most effective for you.
Getting the most out of every post
On top of setting individual schedules for your groups, you can also allocate post repetition for each one, so that each post within that group is shared a set number of times.
Select Profiles and Repetition next to the Schedule button and allocate your default repetition for that group. Posts will only be recycled if you set them to repeat more than once, so think about whether the content is evergreen, or whether it’s only relevant on one occasion.
For example, News & Insights are unlikely to be evergreen, whereas blog posts and pro tips will always be relevant and useful to your audiences – and if you’ve spent time writing an informative and engaging blog article, why only share it once?
When you’ve set the default repetition for a group, it will cycle through the posts until they’ve been shared that set number of times and are moved over to Finished Sending.

If for any reason you want to edit the number of times a particular post is shared in a group, click on the edit icon at the bottom of the post and change the repetition accordingly. This will override the group repetition for this post only.

Managing your groups
Our tool’s user-friendly interface makes editing, deleting and moving your posts super quick and easy. Conveniently navigate between your Drafts (posts will default as draft), Approved posts and those that have finished sending using the tabs in each group.

To move a post from Drafts to Approved, click the tick icon in the bottom left-hand corner of the post. It will then be automatically added to your Calendar so you can easily view what posts are due to be shared across all your social profiles.
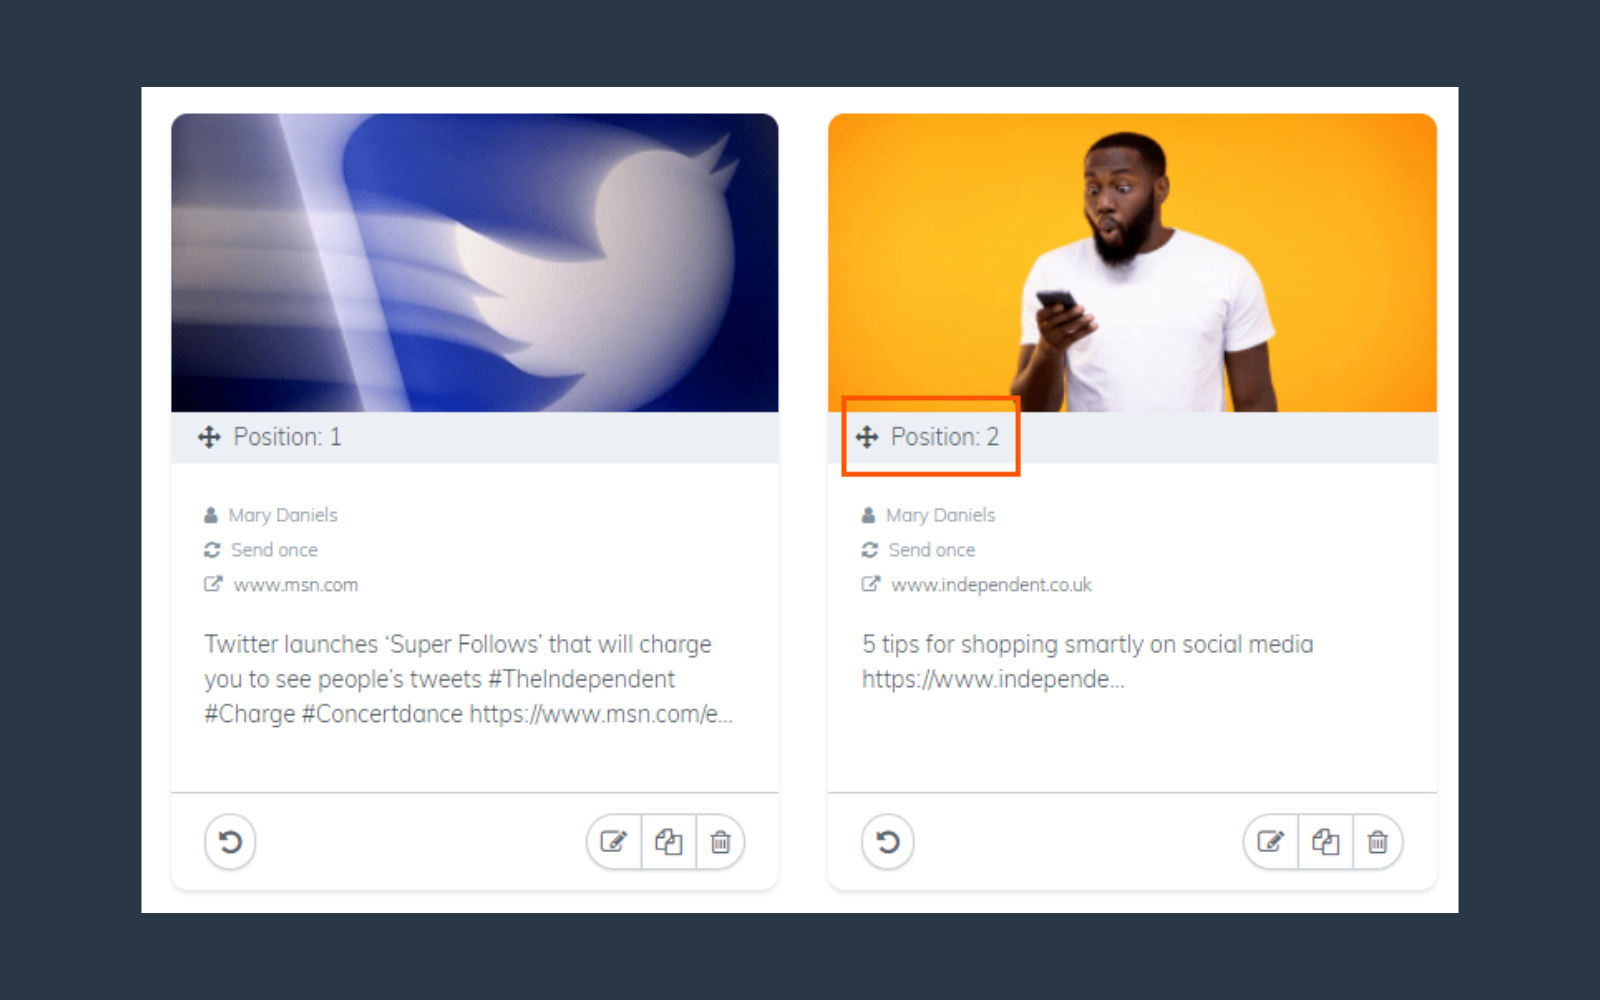
You can conveniently change the order that your posts are shared by selecting the Position icon below the post’s image and dragging and dropping it to its new position.
Now that you’re equipped with all our pro tips on how to make the most of your Post Groups feature, it’s time to get scheduling! And if you have any queries along the way, go to our Helpdesk for FAQs and How-to guides on every aspect of our tool.